
Make Your Own DIY Apple Press For $20
One of my fall pet peeves is all the wasted apples. Everyone loves to go apple picking and everyone picks way too many apples, usually more than ever get used. For years I've been saying I'm going to make my own DYI apple press and enjoy some fresh cider. I even have visions of perhaps fermenting a few jugs.
When you start looking around for an apple press you soon realize that most will set you back a few Ben Franklins, some fancy ones even more than that. I happen to have a bunch of scrap this, and scrap that laying around thanks in part to many projects over the past few years. So, I got to thinkin' what if I just make a press myself? There really isn't too much to it. It may not be the most beautiful press in the world, but I know I can get it functional, and besides, it's all about the results, right.
Here is what you will need to find around your house, or at your local hardware store.
- 5 gallon homebrewing bag
- (2) 5 gallon plastic bucket
- Baking pan with 2" sides and big enough to fit the bucket in to
- Drill and 1/4″ drill bit
- garbage bag
- Plywood 16″ x 16″
- 2x4 (cut into 10 - 8")
- bottle jack, car jack (in a pinch)
- Misc wood for frame
Step 1: You first will need to create a frame for the press to function. This can be created in many ways with just about any lumber you may have lying around. The jist is to have it sturdy enough to allow the press to press the apples, and big enough to fit the press bucket in.
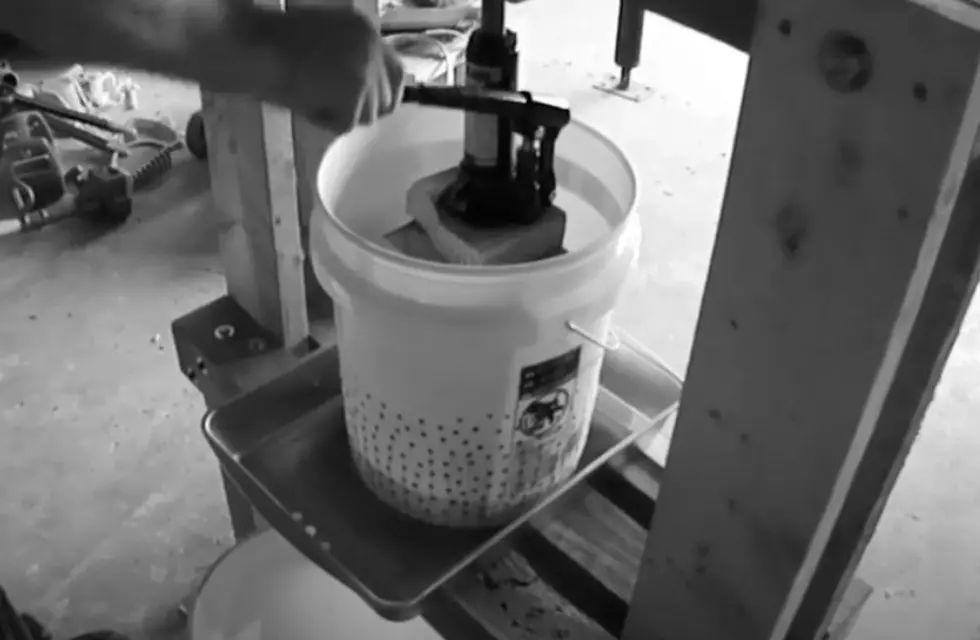
Step 2: Create the press bucket. Drill 1/4″ holes about every 2″ around the bucket starting half down from the top, down towards the bottom.
Step 5: Place chopped apple pieces into the bag, and close it. Place the press plate on top of the apples in the bag.
Step 6: Place the 2x4 pieces side by side on the press plate 2 at a time, going up in a reverse pattern, think Jenga, until you reach the bottom of the jack.
Step 7: Top the 2x4s with the second press plate under the jack.
Step 8: Slowly pump the jack to press the press cider.
This is pretty simplified. It will take some intuitiveness on your part however, it should be pretty obvious.
Here is a YouTube video that walks you through a similar (but not exact) DIY press to help you visualize the process. Enjoy.

LOOK: Here are the best small towns to live in across America
More From B98.5